TomCo Solutions

Category: Storm Damage Repair

  • Post-Hurricane Recovery for Landlords Tampa: Essential Steps & Resources

    Post-Hurricane Recovery for Landlords Tampa: Essential Steps & Resources

    Post-Hurricane Recovery for Landlords Tampa: Essential Steps & Resources

    When a hurricane hits Tampa, your rental properties face risks that can disrupt both your investments and your tenants’ safety. You need to act quickly after the storm to secure your buildings, assess damage, and protect your financial interests. Taking the right steps early makes recovery smoother and helps you avoid long-term setbacks.

    You play a key role in coordinating inspections, handling insurance claims, and keeping communication open with tenants. By staying organized and proactive, you can restore your properties faster and maintain trust with those who live in them.

    Recovery is not just about fixing what broke—it’s about building resilience for the future. With the right approach, you can strengthen your properties against the next storm and protect the value of your investment.

    Key Takeaways

    • Take immediate action to secure properties and ensure safety
    • Manage damage assessments, insurance, and repairs effectively
    • Plan improvements that strengthen long-term property resilience

    Immediate Post-Hurricane Actions for Landlords

    After a hurricane, you need to act quickly to protect your rental property and tenants. Your first steps should focus on safety, accurate records of damage, and preventing additional losses while waiting for repairs or insurance decisions.

    Ensuring Tenant Safety and Communication

    Check on your tenants as soon as it is safe. Confirm their well-being and ask if they notice any immediate hazards such as gas leaks, exposed wires, or flooding. If the property is unsafe, direct tenants to local shelters or temporary housing options.

    Maintain clear communication. Use phone, email, or text to provide updates on inspections, repairs, and expected timelines. According to Hillsborough County storm recovery guidance, displaced residents may even place temporary shelters on their property for up to three years under Florida law. Sharing this type of information helps tenants understand their options.

    Create a contact list that includes emergency services, contractors, and utility companies. Provide this list to tenants so they know who to reach if urgent issues arise before you arrive.

    Documenting Property Damage

    Inspect the property carefully once conditions are safe. Take photographs and videos of all damage, including roofs, siding, windows, floors, and any structural issues. Cover both interior and exterior views.

    Keep written notes with dates and times to support insurance claims. A detailed log of events and repairs helps during the recovery process. This record also protects you if disputes arise with tenants or contractors.

    Encourage tenants to document their personal losses separately. Their belongings are usually covered under renter’s insurance, not your landlord policy. Make sure they know how to report claims to their providers.

    Securing the Property Against Further Loss

    After documenting, take steps to prevent additional damage. Cover broken windows with plywood or heavy plastic. Place tarps over damaged roofs to limit water intrusion. Remove debris that could block drainage or create safety hazards.

    If utilities are unsafe, shut them off until professionals inspect them. Faulty electrical systems, gas leaks, or contaminated water can cause serious risks if left unchecked.

    Secure outdoor items such as furniture, grills, or loose fencing. Unsecured objects can become dangerous projectiles in strong winds and may also cause further property damage.

    Hire licensed contractors for major repairs. Quick but safe action reduces long-term costs and helps stabilize your property during disaster recovery.

    Coordinating Damage Assessments and Inspections

    After a hurricane, you need accurate inspections and clear documentation to protect your property and meet legal requirements. Local officials, insurance representatives, and professional inspectors each play a role in determining the extent of damage and the steps needed for recovery.

    Working With Local Officials and Assessors

    City and county officials often conduct initial inspections to determine whether properties are safe to occupy. You should not re-enter a building until authorities confirm it is structurally sound and utilities are safe.

    Local governments may also coordinate with FEMA to complete Preliminary Damage Assessments. These assessments help determine the scale of disaster recovery efforts and whether federal assistance will be available in your area.

    You should also document your own findings. Take photos of roof damage, water intrusion, and debris, then compare them with the official inspection reports. This ensures you have a complete record for insurance and repair planning.

    Understanding Substantial Damage Determinations

    If your property is in a flood zone, officials may issue a substantial damage determination. This occurs when repair costs equal or exceed 50% of the building’s pre-storm market value.

    A substantial damage ruling often requires you to bring the structure into compliance with current floodplain regulations. This could mean elevating the building, reinforcing foundations, or upgrading electrical systems.

    Failing to comply can affect your eligibility for flood insurance coverage under the National Flood Insurance Program. You should review FEMA guidance and consult with local building departments to understand what improvements are required before starting repairs.

    Correcting Assessment Errors

    Assessment errors are common after major storms because inspectors must process a large number of properties quickly. Mistakes may include overstating structural damage, mislabeling flood impacts, or overlooking repairs already completed.

    You can challenge an error by filing an appeal with the local building department or requesting a re-inspection. Provide supporting evidence such as contractor estimates, engineering reports, or photographs.

    If the error affects your insurance claim, contact your adjuster immediately. Having thorough documentation and professional evaluations will strengthen your case and help you correct the record before costly repairs move forward.

    After a hurricane, you need to secure funding quickly to repair properties, protect tenants, and stabilize your rental income. Insurance payouts, disaster relief grants, and federal or state aid each play a role in the recovery process.

    Filing Insurance Claims Effectively

    Start by documenting all damages with clear photos, videos, and written notes. Include time-stamped evidence to strengthen your claim. Keep receipts for emergency repairs, such as roof tarps or water removal, since many policies cover these costs.

    Contact your insurance provider as soon as possible. Delays may slow down processing and extend repair timelines. Ask for a copy of your policy if you don’t have it on hand, and review coverage for wind, flood, and loss of rental income.

    Organize your claim in a structured way:

    StepActionWhy It Matters
    1Document property damageCreates evidence for adjusters
    2File claim quicklyReduces processing delays
    3Track all repair costsEnsures reimbursement
    4Communicate in writingKeeps a record of agreements

    If your tenants must relocate, check if your policy covers temporary housing or rental loss. This helps you maintain financial stability while repairs are underway.

    Accessing Disaster Relief Grants

    Grants can cover needs not fully met by insurance. FEMA provides disaster relief funds for temporary housing, debris removal, and essential repairs when your property is uninhabitable.

    Local government programs may also provide support. For example, Tampa’s Homeowner Disaster Assistance Program offers repair and relocation help for income-eligible property owners. These funds do not have to be repaid, making them an important option if you face high repair costs.

    Keep in mind that grants often require proof of damage, ownership, and residency. Having organized records and tenant information ready will speed up the process.

    Applying for Federal and State Aid

    Beyond grants, federal and state programs can provide loans and rental assistance. The Small Business Administration (SBA) offers low-interest disaster loans for landlords to repair or replace damaged real estate. These loans can also cover lost rental income until your property is livable again.

    FEMA rental assistance may apply if your tenants cannot return to the property. This program helps cover temporary housing costs while repairs are completed. Details can be found in FEMA’s rental assistance program.

    At the state level, Florida’s SHIP disaster relief program provides funds for relocation, rental assistance, and home repairs. Each county manages its own program, so you should contact your local SHIP office directly.

    When applying, prepare financial records such as mortgage statements, tax documents, and proof of rental income. Submitting complete and accurate paperwork reduces delays and increases the likelihood of approval.

    Combining insurance payouts with these aid programs gives you multiple layers of financial support, helping you restore your property and protect your rental business.

    Restoring and Rebuilding Rental Properties

    When repairing rental units after a hurricane, you must focus on two key areas: hiring the right professionals to complete the work and ensuring the property complies with updated safety and construction requirements. Both steps directly affect how quickly you can return the property to safe, habitable condition.

    Choosing Qualified Contractors

    Hiring licensed and insured contractors is essential during disaster recovery. Unlicensed workers may offer lower prices, but they often lack the training or coverage needed if problems arise. Always verify state licensing through Florida’s Department of Business and Professional Regulation.

    Check references and request proof of insurance before signing any agreement. Written contracts should clearly state the scope of work, timelines, and payment schedules. Avoid paying the full amount upfront. A common approach is to pay in stages as work is completed.

    Using local contractors can be beneficial since they are familiar with county permitting processes and regional building standards. In high-demand periods after storms, out-of-town contractors may appear, so carefully vet anyone who is not established in the Tampa area.

    For major damage such as water intrusion or mold, you may need specialized services. Professional restoration companies handle tasks like water extraction, structural drying, and mold remediation, which are critical for making rental units safe again.

    Meeting Updated Building Codes

    Rebuilding after a hurricane often requires meeting stricter building codes than when the property was first built. Florida has adopted stronger wind-resistance standards, and Tampa landlords must follow these codes when repairing or reconstructing rental properties.

    You should confirm requirements with the local building department before starting work. Permits are usually needed for roofing, electrical, and structural repairs. Skipping this step can result in fines and delays in re-renting the property.

    Updated codes may require impact-resistant windows, reinforced roofing systems, or higher elevation for flood-prone areas. While these upgrades add upfront costs, they improve tenant safety and reduce future storm damage.

    Keeping detailed records of inspections, permits, and contractor invoices also helps with insurance claims and demonstrates compliance if questioned later. This documentation is a key part of responsible disaster recovery.

    Managing Tenant Relations During Recovery

    You need to focus on keeping tenants safe, informed, and supported while repairs are made. Clear communication and practical housing solutions reduce stress and help preserve trust during a difficult time.

    Providing Temporary Housing Solutions

    If your rental becomes uninhabitable, you must act quickly to provide safe alternatives. Some leases or local laws may require you to cover temporary housing costs, while in other cases, insurance may help offset expenses. Review your policy details before making commitments.

    You can arrange short-term rentals, extended-stay hotels, or corporate housing. Document all agreements and keep receipts for reimbursement. Tenants appreciate transparency when you explain what costs are covered and what they must handle.

    Consider offering options in writing so tenants can choose what works best for them. For example:

    OptionTypical UseCost Coverage
    Hotel stayShort-term displacementOften covered by insurance
    Short-term rentalLonger repairsMay be landlord or tenant responsibility
    Family/friendsFlexibleUsually tenant’s choice, no cost to you

    Providing choices shows that you respect tenant needs while protecting your financial position.

    Communicating Timelines and Expectations

    Tenants want to know what will happen and when. Share updates on inspections, contractor schedules, and utility restoration. Even if you do not have exact dates, explain the steps being taken and the order of repairs.

    Use multiple channels—email, text, and posted notices—to ensure everyone receives the same information. Keep messages short but specific. For example: “Roof repairs begin Monday; power should be restored by Wednesday.”

    Set realistic expectations. Avoid promising quick fixes if contractors are backlogged. Instead, explain possible delays and how you will address urgent needs like water leaks or unsafe conditions.

    By being consistent and proactive, you reduce uncertainty and maintain tenant confidence during the recovery process.

    You must follow specific legal and regulatory rules after a hurricane to avoid liability and delays. Local codes and federal floodplain standards play a direct role in how you repair, rebuild, or lease your property.

    Understanding Local Ordinances

    Tampa and Hillsborough County require permits for demolition, structural repairs, and rebuilding after a storm. You cannot begin major work until you secure the proper approvals. This applies to both residential and rental properties.

    You must also meet building, housing, and health codes under Florida’s Landlord-Tenant Act. These codes require you to maintain roofs, windows, plumbing, and other structural elements in safe condition. If your property is a multi-unit building, you must also keep common areas safe and functional.

    Failing to comply with these rules can lead to fines, delays in occupancy permits, or tenant claims for reduced rent. Always check updated county requirements before starting repairs.

    Complying With FEMA and Floodplain Regulations

    If your rental property sits in a flood-prone area, FEMA and local floodplain rules may control how you rebuild. These rules often require you to elevate structures, use flood-resistant materials, or meet specific design standards.

    You may need to obtain an elevation certificate before work begins. Without it, you risk losing eligibility for the National Flood Insurance Program (NFIP). This could make your property uninsurable or limit future tenant demand.

    FEMA also requires “substantial damage” assessments. If repairs cost more than 50% of the building’s value, you must bring the entire structure into compliance with current floodplain standards. This can mean higher upfront costs but ensures long-term safety and insurability.

    Working with local building officials early helps you avoid mistakes that could delay repairs or rental income. Always confirm FEMA requirements before starting any reconstruction.

    Long-Term Resilience Planning for Landlords

    Protecting your rental properties in Tampa requires more than short-term fixes. You need to reduce future risks through durable upgrades and clear procedures that guide you and your tenants when the next hurricane arrives.

    Implementing Preventative Upgrades

    Stronger materials and design features lower the chance of repeated hurricane damage. For example, installing impact-resistant windows and reinforced roofing can help prevent water intrusion and structural loss. These upgrades may cost more upfront but reduce long-term repair expenses.

    Drainage improvements are also critical. Poor water flow leads to foundation damage and flooding. Regularly clean gutters, extend downspouts, and consider adding stormwater management systems. Simple landscaping changes, like grading soil away from the foundation, can also protect your investment.

    Garage doors are a weak point in many homes. Replacing old or non-rated doors with wind-rated options helps maintain structural integrity during high winds. Similarly, inspect siding, seal gaps around utilities, and secure outdoor fixtures to prevent them from becoming storm projectiles.

    By combining these property improvements, you strengthen resilience, protect tenant safety, and reduce disaster recovery costs.

    Developing Emergency Response Plans

    Even with strong buildings, you need a plan that prepares tenants and staff for emergencies. A clear plan reduces confusion and speeds up recovery after a storm.

    Start by creating evacuation routes, emergency contacts, and communication channels. Share this information with tenants in writing and encourage them to keep a copy available. Tenants should know how to report damages quickly and where to go if evacuation is required.

    You should also maintain a list of trusted contractors, electricians, and restoration specialists. Having these contacts ready allows you to begin repairs without delay. Documenting property conditions before and after a storm with photos further supports insurance claims.

    Regularly review and update your emergency plan based on new risks or lessons learned from past storms.

    By combining proactive upgrades with a tested response plan, you make your properties safer and more resilient across multiple hurricane seasons.

    Frequently Asked Questions

    After a hurricane in Tampa, you need to act quickly to protect your property, support your tenants, and follow local rules. Damage assessment, safety checks, government aid, and tenant communication all play a role in recovery.

    How can landlords in Tampa assess property damage after a hurricane?

    Start by inspecting the roof, windows, doors, and siding for visible damage. Take photos and videos of all affected areas for insurance claims. Document flooding, electrical issues, and structural concerns in writing.

    What steps should landlords take to ensure the safety of their rental properties post-hurricane?

    Check for hazards such as exposed wires, gas leaks, or unstable structures. Secure openings with tarps or boards to prevent further damage. If the property is unsafe, restrict access until repairs are made.

    Hiring licensed contractors for repairs will help ensure the property meets code and avoids future risks.

    Are landlords in Tampa eligible for any government assistance following a hurricane?

    Yes, you may qualify for programs that help with repairs or rebuilding.

    You should also check FEMA programs and state-level disaster relief options that may cover property damage or temporary housing costs.

    What are the responsibilities of landlords regarding tenant displacement due to hurricane damage?

    If a property is uninhabitable, you are generally responsible for making repairs in a timely manner. Tenants may have the right to withhold rent or break a lease if the home cannot be safely occupied.

    Florida law requires you to maintain habitable conditions, so delays in repairs can affect your legal obligations.

    How should landlords in Tampa communicate with tenants after a hurricane?

    Reach out as soon as possible with updates on property conditions and repair timelines. Provide emergency contact information and instructions if tenants need to vacate temporarily.

    Clear, consistent communication helps maintain trust and reduces confusion during recovery.

    Conclusion

    Proactive planning, strong communication, and code-compliant repairs are essential for Tampa landlords navigating hurricane recovery. By focusing on resilience and tenant support, you can protect your investment and ensure a smoother recovery process. For expert assistance with post-storm repairs, code upgrades, and long-term resilience planning, contact TomCo Solutions today.

    Failing to repair damage can lead to legal disputes, loss of rental income, or tenant claims for uninhabitable housing. In some cases, tenants may be allowed to terminate the lease.

    You should review lease agreements and Florida landlord-tenant laws to understand your obligations and avoid penalties. For expert assistance in navigating these challenges, contact ToMCo Solutions today.
  • Mold Prevention After a Hurricane in Tampa: Essential Steps & Strategies

    Mold Prevention After a Hurricane in Tampa: Essential Steps & Strategies

    Mold Prevention After a Hurricane in Tampa: Essential Steps & Strategies

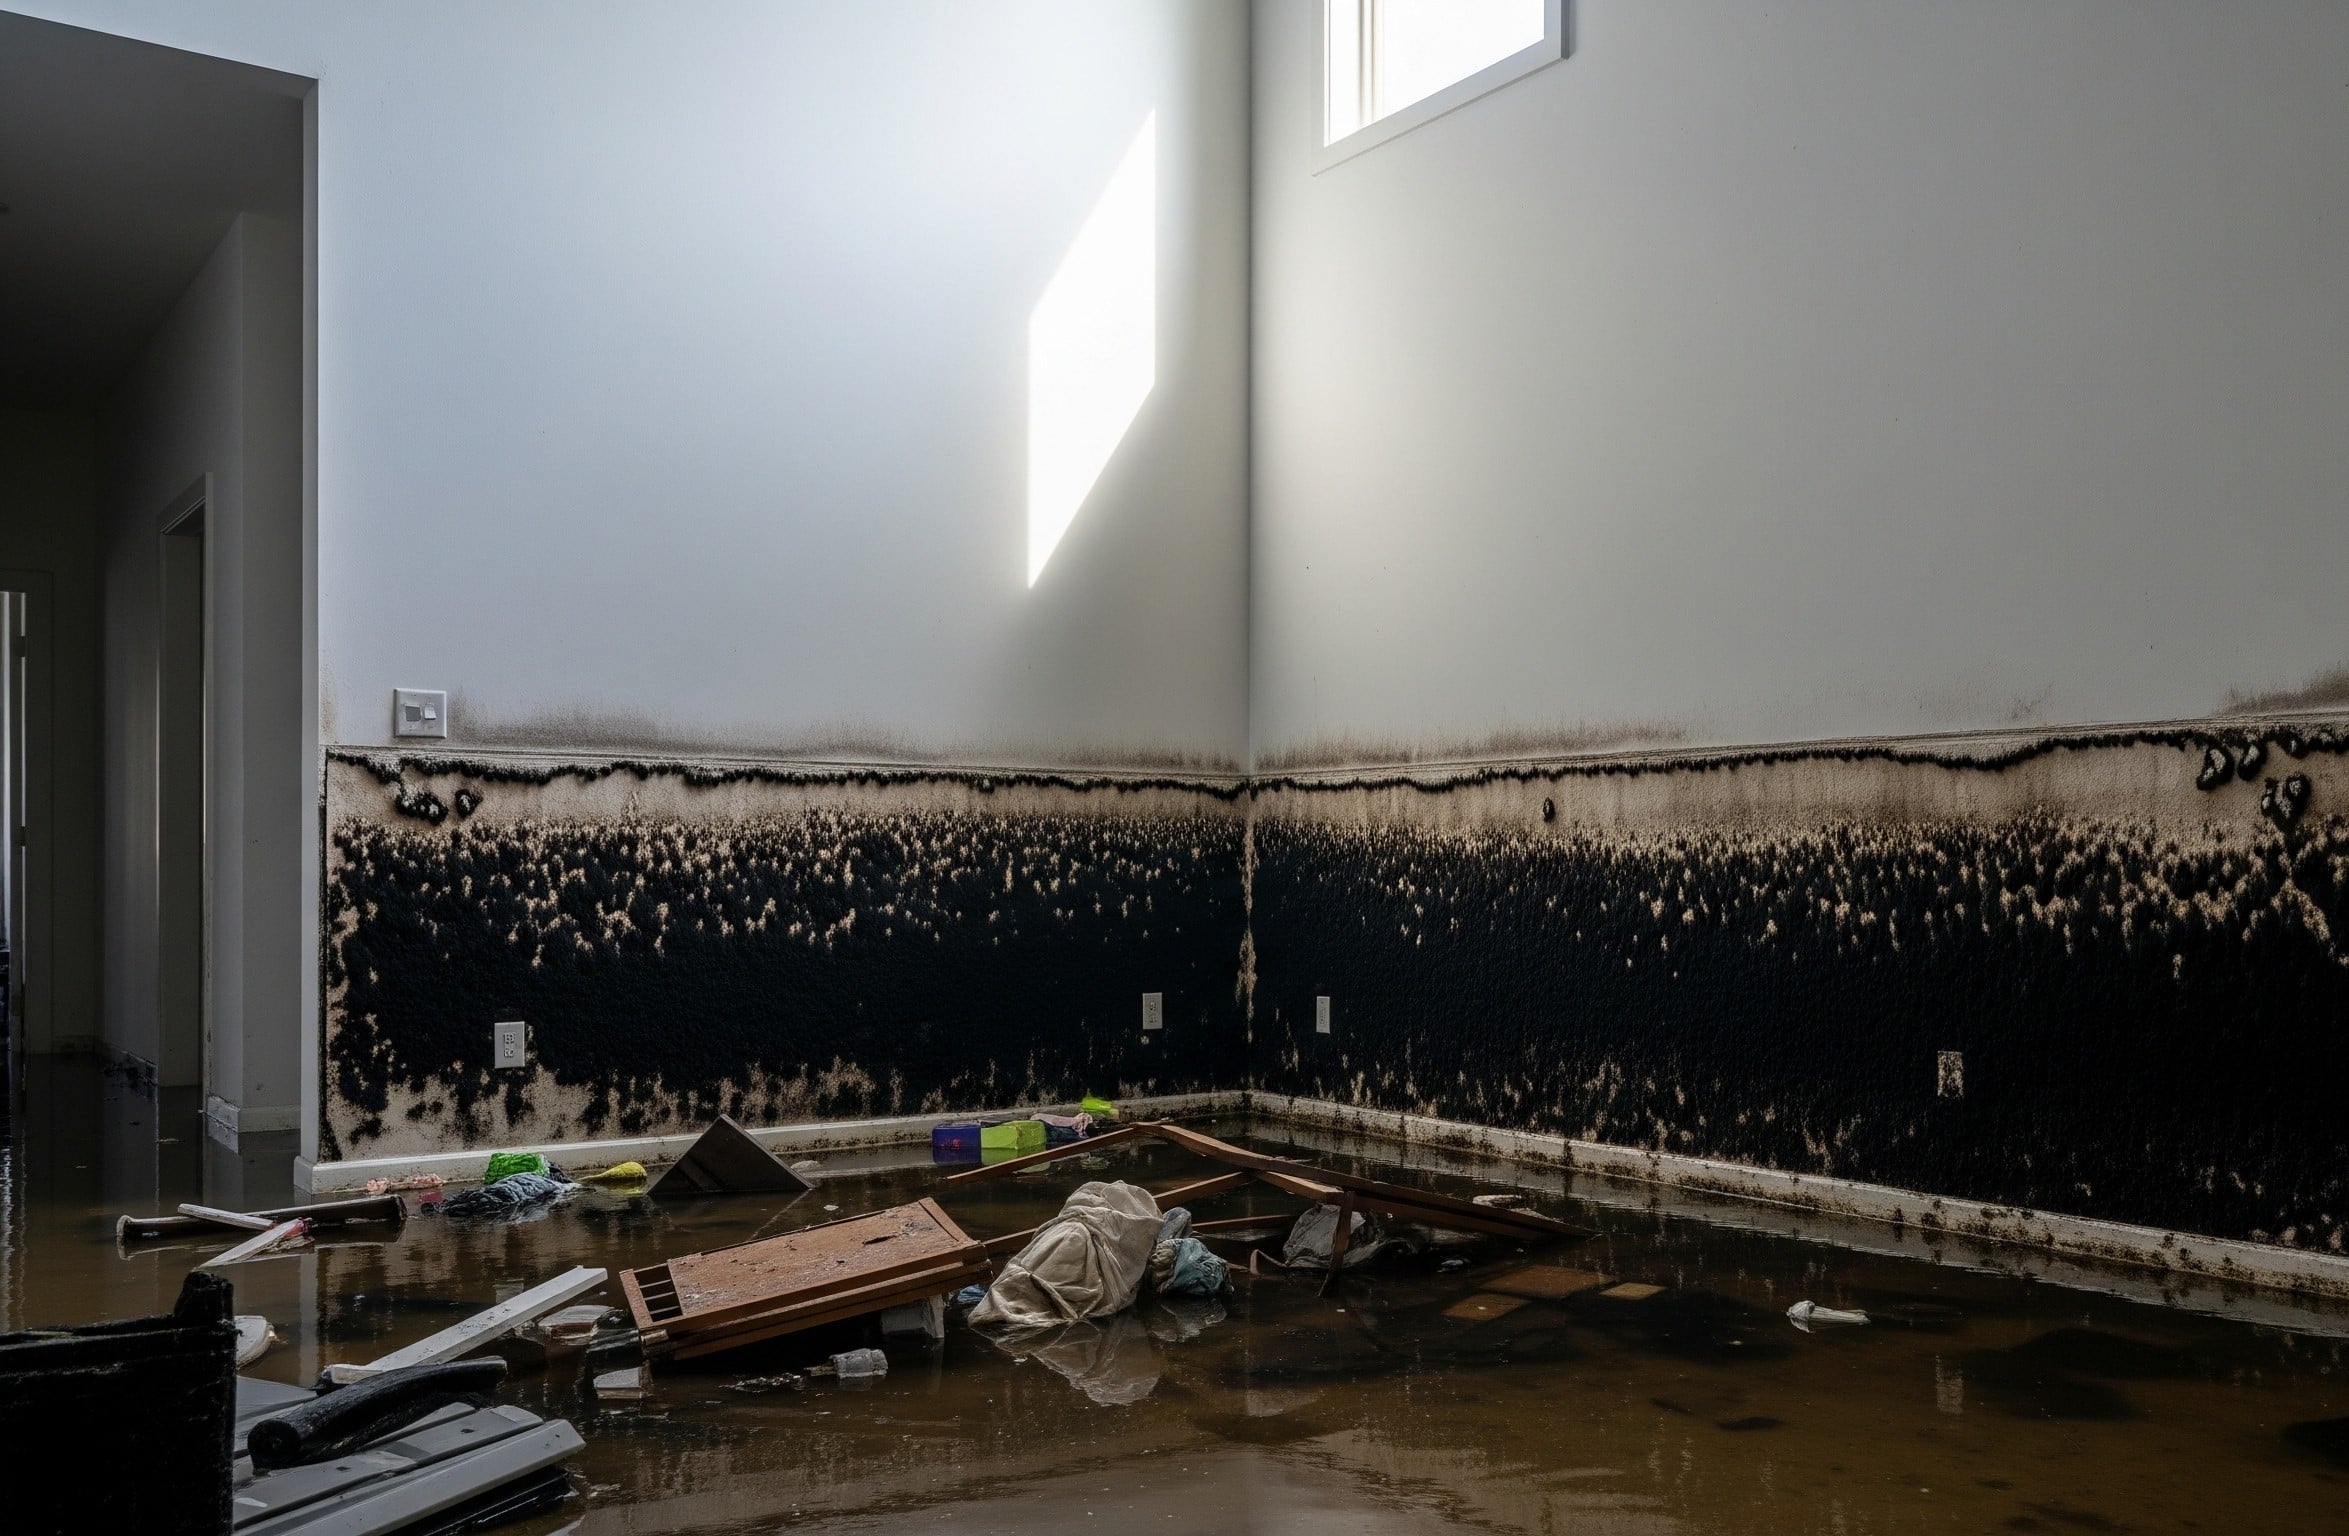
    After a hurricane passes through Tampa, water damage often creates the perfect environment for mold. The warm, humid climate speeds up growth, and in many cases, mold can start spreading within 24 to 48 hours. The best way to prevent mold after a hurricane is to act quickly by removing moisture and drying out your home as soon as possible.

    You need to know what steps make the biggest difference in protecting your home. From spotting hidden water damage to controlling indoor humidity, small actions taken right away can save you from costly repairs later. By learning how to handle these risks, you stay in control of your home’s safety and health.

    Key Takeaways

    • Mold begins quickly after water damage in humid conditions
    • Fast action and moisture control reduce long-term problems
    • Proper inspection and cleanup protect your home’s health

    Understanding Mold Risks After a Hurricane

    When a hurricane passes through Tampa, the combination of heavy rain, flooding, and high humidity creates the perfect setting for mold to thrive. Mold spores spread quickly when water intrusion is not controlled, and exposure can harm both your home and your health.

    How Hurricanes Create Mold Hazards

    Hurricanes often cause roof leaks, broken windows, and flooding that allow water to enter your home. Once water intrusion occurs, building materials like drywall, wood, and insulation stay damp and create a breeding ground for mold spores.

    Tampa’s humid climate makes drying even more difficult. Without proper airflow, moisture lingers in walls, flooring, and furniture. This trapped moisture accelerates mold growth and makes cleanup more challenging.

    Common areas at risk include:

    • Basements and crawl spaces
    • Carpets and rugs
    • Drywall and ceilings
    • HVAC systems

    If you do not remove wet items quickly, mold will spread beyond visible surfaces and into hidden areas. Addressing water damage promptly and improving ventilation are key steps to reducing this risk.

    The 24-48 Hour Window for Mold Growth

    Mold spores can begin to grow within 24 to 48 hours after water exposure. This short window means you must act quickly once flooding or leaks occur.

    Drying out your home as fast as possible is crucial. Use fans, dehumidifiers, and open windows if weather allows. Remove wet carpets, furniture, and drywall that cannot be fully dried.

    A simple timeline to remember:

    Time After Water IntrusionMold Risk Level
    0–24 hoursLow, but rising
    24–48 hoursHigh
    Over 48 hoursVery high

    Health Effects of Mold Exposure

    Mold exposure can affect your health even if you cannot see it. Mold spores travel through the air and may cause allergic reactions, asthma flare-ups, and other respiratory issues.

    You may notice symptoms such as coughing, sneezing, watery eyes, or skin irritation. People with weakened immune systems, children, and older adults are especially vulnerable.

    If you detect musty odors or unexplained health symptoms after a hurricane, you should have your home inspected for hidden mold growth.

    Immediate Actions to Prevent Mold Growth

    Fast steps after a hurricane reduce the chance of mold taking hold in your home. You need to manage water damage quickly, improve air movement, and dry out materials before moisture can spread.

    Removing Standing Water and Moisture

    Start by getting rid of standing water as soon as possible. Mold can begin to grow within 24 to 48 hours of water exposure if left untreated. Use pumps, wet vacuums, or buckets to clear out floodwater.

    Once water is removed, focus on moisture control. Wipe down wet surfaces and use mops or absorbent towels. If the flooding is severe, consider professional water extraction services that use industrial equipment.

    Check hidden areas like wall cavities, under flooring, and inside cabinets. These spaces often trap water and lead to unseen mold growth. Use a moisture meter if available to measure dampness in building materials.

    Ventilation and Air Circulation

    Good airflow helps lower humidity and speeds up drying. Open windows and doors when outdoor conditions are dry. Use fans to push air across damp surfaces, but avoid pointing them directly at mold growth to prevent spreading spores.

    If power is available, run dehumidifiers to pull excess moisture from the air. Aim for indoor humidity levels below 50%. This makes it harder for mold to thrive.

    Air conditioners also help reduce indoor humidity. Set your system to “dry mode” if available, which focuses on moisture removal. In larger spaces, position multiple fans to create cross-ventilation.

    When outdoor air is humid, keep windows closed and rely on mechanical systems instead.

    Drying Materials and Belongings

    Soft materials like carpets, mattresses, and upholstered furniture often cannot be fully dried and may need to be discarded. Hard surfaces such as wood, tile, and metal can usually be cleaned and dried.

    Remove wet drywall, insulation, and ceiling tiles since they hold water and promote mold growth. Place salvageable items in direct sunlight if possible, since UV exposure helps dry and disinfect.

    Use a combination of fans, heaters, and dehumidifiers to dry belongings. Rotate items often so all sides are exposed to air. Keep track of what you throw away for insurance claims.

    Damage Assessment and Inspection

    After a hurricane, you need to carefully check for water intrusion, damaged materials, and hidden moisture that could lead to mold growth. A thorough inspection helps you decide what can be saved, what must be removed, and where professional help may be required.

    Identifying Water Intrusion Points

    Start by walking around your home’s exterior. Look for damaged roofing, broken windows, cracked siding, or gaps around doors. These areas often allow stormwater to enter and spread through walls and ceilings.

    Inside, check for water stains, bubbling paint, or warped flooring. Even small leaks can create hidden moisture pockets. Pay close attention to basements, crawl spaces, and attics, since these areas often trap humidity.

    Use a flashlight to inspect dark corners and behind large furniture. If you notice a musty odor, it often signals unseen water intrusion. Addressing these entry points early reduces the chance of mold spreading throughout your home.

    Assessing Flooded Materials

    Not all building materials respond to flooding the same way. Non-porous items like metal, glass, and hard plastics can often be cleaned and disinfected. Porous materials such as drywall, carpet, insulation, and upholstery usually need to be discarded once soaked.

    When deciding what to keep or remove, consider the type of water. Clean rainwater may allow limited salvage, but floodwater mixed with sewage or debris requires removal of most porous items for safety.

    Sort belongings into three groups: salvageable, questionable, and unsalvageable. Store salvageable items in a dry, ventilated space to prevent further contamination. For questionable items like rugs or furniture, professional cleaning may be needed.

    Document all damaged materials with photos and videos before disposal. This record supports insurance claims and helps guide any professional remediation services.

    Using Moisture Detection Tools

    Moisture is often hidden inside walls, under flooring, or behind cabinets. Relying only on visual signs can cause you to miss problem areas. Tools like moisture meters and infrared cameras reveal damp spots that are not visible to the eye.

    Moisture meters measure the water content in building materials, allowing you to confirm whether surfaces are truly dry. Infrared cameras detect temperature differences that signal hidden water intrusion.

    You can rent these tools from hardware stores or hire a licensed inspector. Professional assessments often include moisture mapping, which creates a detailed overview of where water has spread.

    Regular re-checking with these tools helps track drying progress. Keeping humidity below 50% with dehumidifiers also supports faster drying and lowers the risk of mold growth.

    Effective Moisture Control Strategies

    Moisture control plays a direct role in stopping mold growth after a hurricane. By reducing indoor humidity, keeping air systems clean, and sealing weak points, you limit water intrusion and create conditions that make it harder for mold to spread.

    Dehumidification Techniques

    You should begin by removing standing water as quickly as possible. Mold can start forming within 24–48 hours, so drying the space promptly is critical. Use wet vacuums for carpets and flooring, then set up large fans to keep air moving.

    A portable dehumidifier helps lower indoor humidity to below 60%, which is the threshold for mold growth. For larger homes, consider industrial-grade units that can pull more moisture from the air.

    Place dehumidifiers in areas most affected by flooding, such as basements, bathrooms, and rooms with poor ventilation. Empty the water collection tray regularly or connect it to a drain line for continuous use.

    Monitor humidity levels with a digital hygrometer. Keeping track of readings helps you know when conditions are safe and when additional drying steps are needed.

    HVAC System Management

    Your HVAC system can either help or worsen mold problems depending on how you manage it. If floodwater reached ducts or equipment, shut the system off until it is inspected and cleaned. Running a contaminated system can spread mold spores throughout your home.

    Replace air filters immediately after a storm. A clogged or damp filter traps moisture and reduces airflow. Choose filters with a high MERV rating to capture smaller particles.

    Schedule a professional inspection if you suspect water intrusion in your ducts. Technicians can clean and sanitize the system, ensuring it does not circulate mold. Regular maintenance also improves airflow and keeps humidity levels balanced.

    Keep vents open and unblocked so that conditioned air reaches every room. Proper circulation helps maintain even humidity and prevents hidden damp spots.

    Sealing and Repairing Entry Points

    Water intrusion often occurs through damaged roofs, windows, and wall gaps. After a hurricane, inspect your home carefully for cracks, leaks, or missing seals. Even small openings can allow moisture to seep in and create long-term mold issues.

    Seal gaps around windows and doors with weatherproof caulk. Repair or replace damaged flashing on roofs to keep rainwater from entering. For walls, check siding and exterior paint for peeling or cracks that may let water through.

    Installing vapor barriers in crawl spaces and basements adds another layer of protection. These barriers reduce ground moisture from rising into your home.

    Consider upgrading to mold-resistant drywall and insulation during repairs. These materials help reduce future risks.

    Mold Remediation and Removal Best Practices

    Mold remediation requires careful steps to protect your health, limit the spread of mold spores, and restore safe living conditions. You need to focus on safe cleanup techniques, knowing when professional help is necessary, and handling contaminated items correctly.

    Safe Cleanup Procedures

    Start by wearing protective gear such as N95 respirators, gloves, and goggles. This reduces your exposure to mold spores that can irritate your lungs, skin, and eyes. Keep windows open and use fans to improve airflow, but avoid spreading spores to unaffected areas.

    Use non-porous cleaning tools like stiff brushes and disposable cloths. Clean hard surfaces with detergent and water, then dry them completely. Never mix bleach with ammonia or other cleaners, as this creates toxic fumes.

    Limit the work area by sealing off doors or vents with plastic sheeting. This helps contain spores and prevents cross-contamination. Drying wet materials within 24–48 hours is critical to stop mold from regrowing.

    When to Call Professional Services

    You should contact professional mold remediation services if the affected area is large, typically over 10 square feet. Trained specialists have equipment to contain and filter airborne spores, which reduces the risk of spreading mold throughout your home.

    If mold has penetrated walls, ceilings, or HVAC systems, professionals can inspect hidden areas and remove contamination safely. They may also conduct air quality testing to confirm safe conditions after cleanup.

    In cases of flood damage, hiring experts is often the safest choice. Improper handling of large infestations can worsen contamination and create long-term health risks.

    Disposal of Contaminated Materials

    Porous items like carpets, drywall, and insulation usually cannot be cleaned once mold has grown inside them. You should bag these items in heavy-duty plastic and seal them before carrying them out of the home.

    Label bags as contaminated waste and follow local disposal rules. Some areas require special handling for mold-damaged debris.

    For salvageable items, scrub hard surfaces thoroughly and dry them completely. Use dehumidifiers to keep indoor humidity below 60%. This prevents new mold growth after removal.

    Preventing Future Mold Growth in Tampa Homes

    Moisture control is the most effective way to stop mold spores from spreading in your home. By keeping humidity low, repairing leaks quickly, and using durable materials, you reduce the risk of mold returning after a hurricane.

    Long-Term Maintenance Tips

    You should inspect your home regularly for water leaks. Check your roof, windows, and plumbing at least twice a year. Even small leaks can create damp areas where mold spores thrive.

    Keep indoor humidity below 50%. Use a dehumidifier in humid months and place humidity monitors in areas like basements or bathrooms. After storms, dry out wet areas within 24–48 hours to prevent mold from forming.

    Clean gutters and downspouts so water drains away from your foundation. Standing water near your home increases the chance of moisture intrusion. Also, schedule HVAC inspections since contaminated ducts can spread mold throughout your house.

    If you live in a flood-prone area, consider installing a sump pump or backflow valve. These systems reduce water buildup and limit conditions that allow mold to grow.

    Improving Home Resilience

    Strengthening your home against water damage lowers the chance of future mold problems. Inspect your roof for missing shingles and repair them quickly. Regular roof maintenance is one of the most effective ways to prevent leaks during heavy rain in Tampa’s storm season.

    Seal gaps around windows and doors with weatherproof caulking. This keeps out rainwater and humid air. Insulating exposed pipes also prevents condensation, which can drip and create mold-friendly dampness.

    You can also improve airflow with proper ventilation. Use exhaust fans in kitchens, bathrooms, and laundry rooms. Good airflow reduces moisture buildup and helps keep surfaces dry.

    If you want more protection, consider applying mold-resistant coatings to walls and other surfaces. These coatings create a barrier that helps stop mold spores from settling and spreading after a storm.

    Mold-Resistant Building Materials

    When repairing or rebuilding, choose materials that resist moisture damage. Drywall designed for wet areas, such as “green board” or “purple board,” is less likely to support mold growth than standard drywall.

    Flooring choices also matter. Tile, sealed concrete, or vinyl resist water better than carpet or laminate. If you must use carpet, avoid installing it in basements or flood-prone areas.

    Wood framing should be treated with mold-resistant sealants. You can also use pressure-treated lumber in areas that may be exposed to moisture. For insulation, closed-cell spray foam is more resistant to water than fiberglass or cellulose.

    By combining durable materials with proper installation, you create a home that is less vulnerable to mold after future hurricanes.

    Conclusion

    You can lower the risk of mold after a hurricane by acting quickly. Start by removing standing water, drying out your home, and running fans or dehumidifiers to reduce moisture. Mold can begin forming within 24 to 48 hours, so timing matters.

    If you find small areas of mold, you may clean them with proper safety gear. Larger infestations often require professional help to ensure the problem is fully removed.

    Keep these key steps in mind:

    • Dry out materials such as carpets, drywall, and wood.
    • Check hidden areas like attics, basements, and behind walls.
    • Use protective equipment when handling mold.
    • Call experts if mold spreads beyond what you can manage.

    By taking these steps, you protect both your health and your home’s structure. Staying alert to moisture problems and responding quickly gives you the best chance to prevent long-term damage.

    For expert assistance with mold prevention or remediation, contact ToMCo Solutions today and protect your Tampa home from future mold risks.

    Frequently Asked Questions

    After a hurricane, quick action helps reduce the risk of mold. You need to focus on drying, cleaning, and protecting your home while keeping health and safety in mind.

    What are the first steps to take in preventing mold growth after a hurricane?

    Remove standing water as soon as possible. Discard soaked items like carpets, mattresses, and upholstered furniture. Open windows and doors to improve airflow, and use fans or dehumidifiers if power is available.

    How long does it typically take for mold to develop in a water-damaged home?

    Mold can begin to grow within 24 to 48 hours in damp conditions. Warm temperatures and high humidity in Tampa can speed this process. Addressing water damage quickly reduces the chance of widespread mold growth.

    What are the most effective ways to dry out a building following a flood?

    Use wet/dry vacuums and pumps to remove water. Run dehumidifiers to lower indoor humidity and place fans to increase air circulation. Professional drying services may be necessary if water has seeped into walls or flooring materials.

    Are there specific cleaning solutions recommended for disinfecting surfaces after a hurricane?

    Clean hard surfaces with a mixture of water and detergent. For disinfection, use a solution that contains bleach, but never mix bleach with ammonia or other cleaners. Follow safety instructions on the label and wear gloves during use.

    What precautions should be taken when returning to a home that may have mold growth post-hurricane?

    Wear protective gear such as an N95 mask, gloves, and goggles. Avoid touching or disturbing visible mold until it can be cleaned or removed. If mold covers a large area, consider hiring a professional remediation service in Tampa.

    How can homeowners ensure proper ventilation to prevent mold in the aftermath of a storm?

    Keep windows and doors open when weather allows. Use exhaust fans in kitchens and bathrooms to remove moisture. If electricity is restored, run central air conditioning or portable dehumidifiers to keep humidity levels below 60%. For expert help with mold prevention and remediation, contact TomCo Solutions today.

  • Top Hurricane Insurance Claim Mistakes to Avoid

    Top Hurricane Insurance Claim Mistakes to Avoid

    Top Hurricane Insurance Claim Mistakes to Avoid

    Key Takeaways

    • Be aware of what your Tampa policy includes and excludes. Check hurricane deductibles, wind-driven rain limits and separate flood insurance ahead of storm season.
    • Deductible is calculated as a percentage of dwelling coverage. Verify if it is per storm and plan for increased deductibles in Florida policies.
    • Get it filed immediately after the storm and be exact. Present your insurer with detailed photos, itemized lists, and receipts, and keep a log of every call, email, and inspection date.
    • Separate wind, rain and flood damage. Photograph entry points such as roof damage or blown out windows with timestamps and document flood damage separately for NFIP claims.
    • Be there for the adjuster inspection and don’t accept the first offer without review. Contrast the proposal with licensed contractor quotes that comply with Tampa and Florida building codes and ask for add-ons for missed damages.
    • Hire reputable, licensed Florida contractors and don’t be pressured into signing an AOB. Make sure to get written estimates, confirm insurance and licensing and retain damaged items until the adjuster has seen them.

    Hurricane insurance claims tips in Tampa focus on immediate evidence, meticulous documentation and smart timing. Post a Gulf storm, photograph roof, siding and water lines and keep tarp and dry-out receipts. To expedite matters, report to your carrier and document your claim number and adjuster contact. Understand Florida deadlines, your hurricane deductible and local vendor rates in Hillsborough County. To prevent oversights, the guide below plots each step from first call to fair payout.

    Policy Misunderstandings

    Too many Tampa homeowners discover after a storm that their insurance policy doesn’t work the way they assumed it would. For example, it’s crucial to READ the declarations page and endorsements, NOT just the summary. Homeowners should pay attention to the locations hurricane deductibles pertain to, as flood damage is excluded and wind damage is handled differently. Requesting a written clarification from your agent on what is covered and what requires a separate hurricane insurance claim can prevent small gaps from resulting in huge bills and delayed payments.

    Hurricane Deductibles

    Your hurricane deductible is generally a percentage of your Coverage A dwelling limit, not a flat dollar amount. If your house has $400,000 coverage and the policy states a 2% hurricane deductible, you have to pay the first $8,000 of covered hurricane loss before the insurer does. That can be a shock if you planned around your standard $1,000 deductible.

    See what sets it off. In Florida, carriers bound the “hurricane event” window with National Hurricane Center advisories. Some policies count the deductible just once per season, others, per storm. That distinction counts in a season with several Gulf storms moving bands over Tampa Bay.

    1. Flat standard deductible: applies to non-hurricane losses. Lowest out-of-pocket but might not hold true if a hurricane watch/warning is in effect.
    2. Percentage hurricane deductible (1%–5%+): lowers premiums but raises your cash exposure. More percent means less payout on smaller claims.
    3. First-hurricane-only deductible: resets to standard deductible for later storms; diminishes repeat-season exposure.
    4. Per-event deductible: each storm triggers a new percentage. Increases cumulative costs. Create an emergency fund appropriate to your % and insured value.

    Flood Exclusions

    Most homeowners policies don’t cover flood, including storm surge, rising bay waters and street flooding. This is the #1 source of death and property damage after hurricanes in Tampa neighborhoods around Old Tampa Bay, Davis Islands and Shore Acres.

    Purchase individual flood insurance from NFIP or the private market. Check building and contents limits, TLE options (usually not in NFIP), waiting periods. Don’t wait for a named storm–new policies typically have a 30 day wait.

    Review the water damage exceptions. Maintain a distinct log and photos for flood-damaged vs. Wind-damaged merchandise. Confusing the two can delay the claim and reduce your payment. If water comes up from the ground, it’s probably got to have flood coverage — not homeowners.

    Wind-Driven Rain

    Policies differ on interior water that comes in with wind. Some insure it if wind initially compromises the roof or exterior, others exclude if the opening was there before, or from wear. Words are important.

    Snap pictures of shingles that are missing, soffit openings or broken window capping. Demonstrate how the rain entered. Isolate those expenses from flood damage to downstairs rooms.

    Have your adjuster put in writing that interior ceiling stains and wet drywall are windstorm or flood. Push for the wind sponsor information. This prevents a denial connected to the incorrect reason for loss.

    Critical Filing Errors

    Tampa hurricane insurance claims travel quicker when they’re neat, organized, and submitted on time. Florida homeowners face strict deadlines; missed dates and thin evidence often lead to denials or underpayment.

    1. Delayed Reporting

    File your hurricane damage claim with your insurer as soon as it’s safe, especially during hurricane season. Florida homeowners must now file most first claims within 1 year and supplemental claims within 18 months; missing these windows can close the door on recovery. Be sure to document the date and time you initially phoned or tendered a notice—save the email and/or claim number and call log to support your property damage claim timeline.

    Delay can hurt your insurance claims process in three ways: evidence fades or gets tossed, new rain exacerbates damage and muddies cause, and the insurance company may argue prejudice due to late notice. After a Gulf surge or feeder bands dump rain across Hillsborough County, fast notice distinguishes weatherrash from subsequent water infiltration. Observe caution, but file your hurricane insurance claim after the storm warning lifts and roads open.

    2. Incomplete Information

    List all impacts: roof, soffits, windows, lanai screens, fencing, shed, attic insulation, garage door, flooring, drywall, cabinets, and appliances. If Bayshore Boulevard flooding sent water into a ground-floor unit, record baseboards, wall wicking height and contents.

    Use a simple checklist: building envelope, interior finishes, electrical, HVAC, plumbing, contents, and exterior structures. Include photos, receipts, permits and previous maintenance. Add serial numbers for large items and document pre-storm condition. One little oversight—like ignoring loose gutters—can slash thousands from a check.

    When asked, fill out sworn proof-of-loss forms–sign and date them, and maintain copies in one folder or cloud drive to prevent mix-ups.

    3. Vague Descriptions

    Use clear, concrete terms: “30 asphalt shingles missing at rear slope,” ‘living room drywall bubbled 18″ from floor’, ‘HVAC air handler shorted after attic leak.’ Prevent ‘some damage.’

    Create a table to guide your file even if you don’t submit the table itself:

    • Item: Roof—Location: Rear slope—Damage: Shingles torn, lifted—Qty: 30—Est. cost: $X
    • Item: Bedroom dresser—Location: NE corner—Damage: Swollen wood—Age: 3 years—Value: $X

    Plain, specific language helps adjusters gauge scope without guesswork.

    4. Premature Repairs

    Put permanent solutions on hold until the insurance adjusters visit. Focus solely on temporary fixes—tarps, dehumidifiers, board-ups—and save absolutely every receipt! Document everything with photos pre and post temporary work. If you replace a roof or remove cabinets too soon, the insurance company will challenge the scope, price, and cap payment.

    5. Discarding Evidence

    To support your hurricane damage claim, save torn up shingles, carpet and pad, baseboards, and warped furniture for the adjuster to see. If health or mold forces disposal, capture wide and close-up photos, measurements, and tag by room. Keep recovered parts in containers or a dry garage. Maintain a checklist with descriptions and approximate values. Record every call, email, estimate, and invoice throughout the insurance claims process. Remember the 1-year, 18-month, and 5-year lawsuit deadlines to safeguard rights.

    Documentation Flaws

    Poor documentation delays hurricane insurance claims in Tampa, sparks conflicts, and jeopardizes underpayment. Adjusters require clear proof of what you owned, what changed, and the costs to fix hurricane damage. Organize files by category, take notes during each call to your insurance company, and back up digital versions in case wind or flood destroys paper originals.

    Pre-Storm Inventory

    Craft a room-by-room list prior to June. Note make, model, serial numbers and upgrades for big ticket items like HVAC units, roofs, and appliances found in Tampa block homes and condos. Don’t forget to include boats, dock gear and patio enclosures, if applicable, as coastal wind and surge generally hit these structures first.

    Add a ballpark value and buy date for each item, and hold on to receipts for major purchases like impact windows or a new shingle roof rated for Florida wind codes. Recording slow-motion video of each room, including closets and ceilings, can help document the pre-storm condition and any previous repairs. This thorough preparation can streamline the insurance claims process after a disaster.

    Refresh after remodels/garage conversions/new electronics. If you haven’t examined your policy recently, review coverage limits and sub-limits now, as gaps frequently result in documentation flaws later when amounts exceed coverage stated.

    Post-Storm Photos

    Shoot damage immediately it’s safe, prior to clean-up. Timestamp on Begin with wide shots, of the front, back and both sides to capture wind direction, tree fall paths and roof tarps. Then take close-ups: lifted shingles, missing soffits, cracked tiles, water lines on drywall, swollen baseboards, and fence breaks.

    Take pictures of all rooms from corners. Pull open cabinets and closets to snag hidden water stains or mold menace. Don’t forget exterior systems: pool screens, gutters, sheds, docks, and seawalls. If flood water came in, mark water height on a tape measure in the frame. Organize photos by location—Roof, Living Room, Primary Bath, Garage—to accelerate adjuster review and minimize pushback which can lead to delays or denials.

    Detailed Receipts

    Save all receipts associated with emergency work and living expenses. We’re talking roof tarps, tree removal, dehumidifiers, hotels on Fowler Ave, generator fuel, and meals if your kitchen is out. Label each with the related damage: “Master bath leak—fan rental,” or “Roof—blue tarp install.” File along with your claim to promote ALE reimbursement and to prevent underpayment.

    Track calls and emails: date, time, names, and topics. If a desk adjuster, changes record it. Back up files to cloud and external drive, storms in Tampa can wipe paper records quick.

    Expense tracking and claim alignment:

    DateVendor/ServicePurposeAmount (USD)Damage LinkPaid ByReimbursed
    9/15TarpProEmergency tarp650.00Roof upliftCardPending
    9/16Gulf Tree CareTree Removal425.00Fence ImpactCashApproved

    Adjuster Interactions

    In Tampa, the high volume of hurricane insurance claims following a storm leads to insurance adjusters performing rushed inspections, often missing crucial hurricane damage and making low opening offers. Keep it together, stay on the record, and be there.

    Accepting First Offer

    Go through the first settlement, line by line, and compare it to your pictures, bids, and a room-by-room loss list. For Tampa homes, inspect roof shingles, soffits, gutters, fascia and window seals — wind-driven rain frequently manifests as ceiling stains weeks later, so contrast the offer to updated moisture readings if available.

    If not, bargain. Request a detailed itemized cost analysis by trade, scope and depreciation. Ask, in writing, for the explanation for all such deductions or exclusions. If the adjuster mentions old damage, have them provide the date and evidence. They’ll occasionally ask for unrelated stuff, like a remodel invoice from five years ago, which doesn’t correlate to the storm loss. Don’t feel pressured to sign. Most adjusters start low. You can rebut with local estimates from licensed Tampa contractors who are aware of code upgrades and wind mitigation guidelines.

    If policy language is ambiguous, stop. Coverage misreads are endemic and underpaid claims. Think about a public adjuster or contractor or attorney if the back and forth stall.

    Unsupervised Inspections

    Go to every inspection. Walk the outside and roof edges if secure from the ground, indicate lifted shingles, ridge caps, bent drip edge, fence panels. Inside, attic leaks, wet insulation, baseboard swelling and hairline cracks by lanai doors.

    Request that adjuster run a moisture meter test for hidden water in ceilings, closet corners and behind cabinets. In slab homes across Hillsborough County, observe foundation cracks or tile tenting following storm surge or heavy rain.

    Take your own pictures and notes. If power surges were involved, note serial numbers for damaged appliances. If the adjuster overlooks areas, ask for a return visit and get the request in e-mail. Store all emails, photos, estimates, and receipts in a single folder to share quickly and prevent errors.

    Adjusters work for insurers and can deploy any tricks that keep the money in the company. A cool, confident presence assists in holding the scope full.

    Recorded Statements

    Watch recorded statements. Provide facts only—date of storm, when discovered the damage, what you did to mitigate additional loss such as tarp or boarded windows. Don’t speculate about causes or costs.

    If you’re not sure, say you’ll have to check your policy and records first. Request a copy or transcript for your records. Politely refuse questions that stray beyond the loss or request gratuitous documentation. When overwhelmed, get assistance from a licensed pro who can advocate for you.

    Contractor Pitfalls

    Tampa’s storm recovery attracts contractor rush, emphasizing the importance of hurricane insurance claims to protect your wallet.

    Signing an AOB

    An AOB transfers your insurance rights for the work to the contractor. They can bill and collect right from your insurer, but they cannot directly negotiate scope and price. That’s your job, your insurer, or a licensed public adjuster or attorney. If a contractor presses to ‘manage your claim,’ stop.

    Be sure to read all the AOB terms carefully, watching for fees, cancellation penalties, and language that gives the contractor control over total claim proceeds. Certain outfits may deduct as much as 15% from the payout of your hurricane damage claim, leading to a smaller reimbursement that could drain funds from other repairs. Always sign up only with a licensed, top-rated Tampa contractor after ensuring they don’t overstep their legal capacity.

    If you do proceed, cap authority to a specific trade and dollar amount, and require an itemized invoice to support your property damage claim. Retain the right to approve change orders, and get everything in writing while keeping copies for your claims process file. This approach will help ensure you receive a fair settlement for your property damage.

    No Written Estimate

    Don’t green-light work without a detailed written estimate. It should include labor, materials, line-item quantities, unit costs, permits, debris disposal, warranty terms, and a timeline.

    Get a few Tampa Bay contractor quotes – at least three local estimates from well-established Tampa Bay firms like TomCo Solutions. As a leading general contractor in Tampa, TomCo Solutions provides comprehensive, no-obligation estimates tailored to your needs, ensuring every detail is covered. Cross-check scope, material specs (e.g., shingle grade rated for high wind), and allowances to identify padding or overlooked damage. Use estimates as claim support, but be aware that contractors occasionally lowball or exaggerate losses. Make payments milestone-based, and never feel pressured to sign that same-day. At TomCo Solutions, we prioritize clear, fair pricing to build trust from the start.

    Unlicensed Workers

    Validate all company and qualifier licenses with the Florida DBPR and confirm active GL and workers’ comp. Request certificates naming you as the certificate holder and check with the carrier. Unlicensed or uninsured crews can nullify coverage, delay permits in Hillsborough County, and leave you liable if someone is injured.

    Verify who will actually be there. Most companies subcontract roof, electrical, or mitigation—those subs need to be licensed and insured as well. TomCo Solutions, a fully licensed and insured Tampa general contractor, uses vetted in-house teams and trusted subcontractors, all compliant with state regulations. If you run into unlicensed activity, report it to DBPR or local officials. Save pictures of badges, trucks, and permits for your own records.

    Underpaid Claims

    Underpaid claims after Tampa storms. Check the settlement line by line against your photos, videos, measurements, and contractor bids. Scope of work vs unit prices vs depreciation Flag gaps in which the payout will not cover real repair costs. Underpaid claims shove costs back on you, which can be steep when roofs, windows, stucco and interiors all need attention.

    Overlooked Damages

    Hidden issues can pop up weeks later in Tampa’s heat and humidity. Watch for roof deck soft spots, drenched insulation, attic leaks, stucco cracks, failed window seals, garage door tracks warped by wind, slab or tie-down problems in vintage homes. Mold grows quickly after power outage. If you discover new damage, supplement your claim immediately with dates, pictures, moisture readings and a note from a licensed contractor.

    Common storm and flood items to inspect:

    • Roof shingles, flashing, underlayment, sheathing
    • Soffits, fascia, gutters, downspouts
    • Windows, doors, frames, weatherstripping
    • Stucco, siding, paint, exterior trim
    • Attic insulation, rafters, trusses
    • Drywall, baseboards, flooring, subfloor
    • HVAC condenser and air handler
    • Electrical panels, GFCIs, outlets, light fixtures
    • Kitchen and bath cabinets, vanities
    • Fences, sheds, pool cages, docks

    Request a supplemental claim when new issues arise following that initial adjuster visit. Out-of-state or temporary adjusters tend to miss regional damage patterns, resulting in low estimates. Tampa roofer or engineer second opinions help set the record straight.

    Code Upgrades

    Check your policy for Ordinance or Law coverage. Tampa & Florida Building Code may require roof deck re-nailing, secondary water barriers, shingle wind ratings, uplift-rated doors, impact windows in specific zones and updated strapping. These costs are not “nice to have”, they are required to pass a permit.

    Preserve invoices, permits and contractor notes referencing the specific code sections. Send them with your claim so upgrades are paid, not cut as “betterment.” Verify with your contractor what Hillsborough County upgrades are required prior to work commencement. If the carrier denies code costs, cite policy language and the local code references in your appeal.

    Mismatched Materials

    Matching counts for value and curb appeal. If a couple of slopes give but the others are sun faded, a patch won’t match. Same with tile, stucco texture, or luxury vinyl planks. Record color fade and discontinuation with close-up photos, manufacturer information and letters from the retailer.

    Tell the insurer in writing when materials don’t jive. Request extra for a complete slope, pitch or run of floor if the item is not in stock or is priced higher. If the carrier pushes back, file with a contractor estimate and, if necessary, a public adjuster or lawyer letter. Appeals can be a hassle, but Florida law might permit fee-shifting if you win in court on an underpaid claim.

    Conclusion

    Tampa hurricane claims require clear action and calm minds. Read your policy now, not after a storm. Be familiar with your wind, flood and roof terminology. Plan for pictures, receipts and a good ‘stuff’ list. Store dates, names, claim notes all in one place. Shoot wide and tight shots. Save before and after pictures. Record roof tarps, tree work and board-up expenses.

    Confront the adjuster with facts. Be courteous. Respond with concise, factual bullets. Receive 2-3 bids from licensed Tampa pros. Verify state license and reviews, not just price. Back low offers with proof, like line-item scopes and local rates.

    Need help with a sticky claim? Contact us for a fast, no-obligation claim review today!

    Frequently Asked Questions

    What parts of my homeowners policy usually cover hurricane damage in Tampa?

    Review your Declarations Page and windstorm/hurricane endorsements, as in Tampa, wind damage is typically covered, while a flood damage claim due to storm surge necessitates separate NFIP or private flood insurance. Check hurricane insurance deductibles, usually a percentage of your dwelling limit.

    How soon should I file a hurricane claim after a Tampa storm?

    Submit your hurricane damage claim as soon as it’s safe—ideally within days. Florida law allows up to a year for hurricane insurance claims, but filing early preserves evidence, hastens inspections, and lowers conflict. Contact your insurance company first, then confirm your claim number in writing.

    What documentation helps avoid claim denials or delays?

    Document exterior and interior hurricane damage with date-stamped photographs and videos. Maintain repair estimates, receipts, and a loss inventory for your hurricane insurance claim. Preserve temporary repair receipts (tarps, board‑ups) and maintain a call log of insurance adjusters’ names and times. Back up all of it in cloud storage.

    How should I handle the insurance adjuster visit?

    Be there during the insurance claims process. Take the adjuster by the hand and walk him or her through all hurricane damage, including attic, roof, soffits, and water-stained areas. Supply your pictures and quotes for your hurricane damage claim. Don’t minimize problems; get the scope in writing and follow up with an email summarizing what you saw and what was promised.

    What are common contractor pitfalls after a Tampa hurricane?

    Beware of door-to-door solicitors and hard sales efforts when dealing with hurricane damage claims. Always check Florida licensing, insurance, and local Tampa references. Before signing an Assignment of Benefits, consult with an attorney to ensure a fair settlement.

    What if my hurricane claim is underpaid?

    Request a detailed estimate and depreciation schedule for your hurricane damage claim. Consider utilizing a Florida-licensed public adjuster or property damage attorney to assist with your insurance claims process. Ensure all documentation is received in writing for a smoother claims process.

    Do temporary repairs affect my claim?

    No—insurers expect homeowners to take reasonable steps to mitigate hurricane damage. Tarp roofs, board up openings, and dry wet areas are essential. Preserve your receipts and before/after photos for your hurricane damage claim! Don’t fix anything permanently before the insurance adjuster records the loss, unless safety dictates.

  • Tampa Launches Homeowner Disaster Relief Program for Hurricane-Affected Residents

    Tampa Launches Homeowner Disaster Relief Program for Hurricane-Affected Residents

    Tampa Launches Homeowner Disaster Relief Program for Hurricane-Affected Residents

    ​The City of Tampa has launched the Homeowner Disaster Relief Program to provide financial assistance to homeowners affected by the 2024 hurricanes, Helene and Milton. With $3.2 million allocated from state funds, this initiative aims to support residents in repairing and restoring their homes.​

    Program Overview:

    The Homeowner Disaster Relief Program offers three types of assistance:​

    • Insurance Deductible Assistance: Up to $10,000 to cover insurance deductibles.​
    • Mortgage Assistance: Up to $5,000 to aid with mortgage payments.​
    • Cost of Repair Assistance: Up to $20,000 for essential home repairs.​

    Homeowners can apply for one or more categories, with a maximum total reimbursement of $20,000 per household. ​

    Eligibility Requirements:

    To qualify for the program, applicants must meet the following criteria:​

    • Own and occupy a home within Tampa’s city limits.​
    • Have an income up to 140% of the area median income (approximately $133,000 for a family of four).​
    • Provide documented proof of damage from Hurricanes Helene or Milton.​

    Priority will be given to lower-income households, with 30% of funds reserved for those earning 50% or less of the area median income, and another 30% for those earning 80% or less. ​

    Exclusions:

    The following properties are not eligible for assistance:​

    • Manufactured or mobile homes.​
    • Properties outside Tampa’s municipal boundaries.​
    • Second homes, including rental properties.​
    • Homes with existing liens or judgments.​

    Application Process:

    Eligible homeowners can begin the application process by completing a pre-application screening. Click here for details

    Once approved, funds are expected to be disbursed within approximately 30 days.

    Due to limited funding, residents are encouraged to apply promptly to secure assistance. For more information and to access the application portal, visit the City of Tampa’s official website.​

    This program reflects Tampa’s commitment to supporting its residents in recovering from the impacts of the 2024 hurricane season.​

    TomCo Can Help

    ​If your home has been impacted by Hurricanes Helene or Milton, TomCo Solutions is here to help. As a licensed and insured disaster restoration contractor in Tampa, we specialize in storm damage repairs, including water extraction, roof repairs, and structural assessments. Our experienced team is dedicated to restoring your home efficiently and with the highest quality craftsmanship. Contact us today for a free consultation and let us assist you in bringing your home back to its pre-storm condition.

  • FEMA’s 50 Percent Rule | What You Need to Know

    FEMA’s 50 Percent Rule | What You Need to Know

    FEMA’s 50 Percent Rule | What You Need to Know

    Key Takeaways

    • The FEMA 50 Percent Rule determines whether a repair or improvement to a flood-damaged property is “substantial.” If they are, property owners have to adhere to more rigorous floodplain regulations.
    • Property owners must determine the repair versus improvement costs. They need to determine whether these costs exceed the 50% threshold by comparing them with the building’s market value right before the damage occurred.
    • These are difficult times for homeowners and businesses in flood-prone areas. In return, they need to adhere to very strict regulations to remain in compliance and reduce the likelihood of future floods.
    • Local governments play a critical role in enforcing the rule, ensuring consistent damage assessments and supporting community floodplain management efforts.
    • Accurate property value assessments and detailed cost documentation are essential for determining compliance with the rule and avoiding unnecessary penalties.
    • After experiencing flood damage, homeowners need to take photos of the damage, get in touch with your local officials, and weigh repair options at the same time they’re thinking about rebuilding or elevating their homes for long-term safety.

    It has an outsized effect on regulating development in flood zones. This rule states that if the cost of repair or renovation equals or exceeds 50% of the building’s market value, the structure must comply with current floodplain management regulations.

    This requirement applies to residential and non-residential buildings alike, promoting safety and long-term decrease in flood risk. Local governments are required to enforce this rule as a condition of participation in FEMA’s National Flood Insurance Program.

    This means that accurate project cost estimates and property market valuations are necessary for compliance. Being knowledgeable about this rule can help property owners to better plan for future repairs, while still complying with regulatory standards.

    It encourages more responsible and resilient construction practices and ultimately saves property—and more importantly, lives—of Americans who live in harm’s way in flood-prone areas.

    What Is the FEMA 50% Rule?

    The FEMA 50% Rule is a critical provision of the National Flood Insurance Program (NFIP) that plays a significant role in substantial damage determination. This rule outlines when a building within flood hazard areas must comply with current floodplain management guidelines. Its application is based on two scenarios: substantial damage (SD) and substantial improvement (SI).

    This regulation implements a 50% threshold linked to a structure’s market value, ensuring that properties undergoing extensive repair work or renovation meet contemporary safety standards. This approach fosters long-term flood risk resiliency, protecting both individuals and property from flooding hazards while conserving taxpayer dollars.

    Definition and Purpose of the Rule

    Substantial Damage occurs when repair costs equal or surpass 50% of the structure’s pre-damage market value, regardless of the damage source. Substantial Improvement, on the other hand, applies to renovations exceeding the same threshold.

    Market value assessments are vital since they establish baseline compliance requirements. The rule’s purpose is to reduce flood risks by enforcing stricter rebuilding standards, ensuring structures meet NFIP and local floodplain regulations. For example, a home in a Special Flood Hazard Area (SFHA) damaged by a hurricane would require elevation or other modifications to meet these standards.

    Key Objectives of the Rule

    The 50% Rule seeks to protect lives, reduce property damage, and encourage responsible construction in flood-prone zones. It prioritizes consistency in substantial damage assessments, allowing local officials to apply regulations uniformly.

    This consistency helps maintain fairness for property owners while supporting broader flood mitigation goals. The rule addresses repetitive loss properties, ensuring these structures are better prepared for future flooding events.

    How It Impacts Property Owners

    Property owners are left with substantially higher repair costs when it is decided that there is substantial damage. Restoring properties to comply with current flood regulations usually involves costly actions, like elevation or floodproofing.

    Getting permits for any repairs or improvements becomes required, especially for buildings located in SFHAs. Failure to comply with the rule can lead to increased insurance premiums or denial of NFIP claims.

    Increased Cost of Compliance (ICC) coverage assists in paying costs associated with elevation, relocation or demolition. This resource provides financial relief that is long overdue.

    Who Does the Rule Affect?

    In short, the FEMA 50% rule mostly benefits property owners, businesses, and local governments in flood-prone areas. This is especially true for underserved communities enrolled in the National Flood Insurance Program (NFIP), making implementation all the more important. It prevents future flood damage and brings communities into compliance with federal floodplain management standards.

    Below, we analyze the groups most affected and what they need to do.

    1. Homeowners in Flood-Prone Areas

    Homeowners in FEMA-designated flood zones have additional responsibilities when it comes to the FEMA 50% rule. If a home is substantially damaged or improved beyond 50% of its market value, it must meet current floodplain management regulations, such as elevating the structure.

    Homeowners would be expected to self-report damage and seek special permits to repair or upgrade beyond code. In eligible cases, FEMA offers assistance in the form of grants or low-interest loans, lifting some of the financial burden for individuals.

    2. Businesses in High-Risk Zones

    That includes commercial property owners in high-risk flood areas. They need to closely evaluate repair and improvement costs to make sure they comply. Failure to comply can cause major disruptions to the flow of business and carry stiff fines.

    Following local building codes and floodplain management regulations is important for community and economic recovery and minimizing future risk. For example, a business may be required to elevate its building’s foundation above established floodplain levels.

    Or, it could be proactive and floodproof its facility to remain in compliance.

    3. Communities Under FEMA Guidelines

    Local governments play an essential role in enforcing the FEMA 50% rule. They are tasked with determining substantial damage or improvement through inspections and fair assessments.

    Communities can establish clear procedures for managing damage evaluations, which ensures transparency and efficiency. Applying the rule consistently across all properties helps maintain trust and compliance, contributing to long-term flood resilience.

    Calculating Damage and Improvement Costs

    Even if a project has damage, knowing how to calculate repair and improvement costs is key to understanding whether a project meets FEMA’s 50% rule. This rule applies when the cost to repair or improve a structure equals or exceeds 50% of its pre-damage market value.

    Complete and accurate calculations, and strong supporting documentation, not only demonstrate compliance but help to prevent costly delays in the permitting process.

    1. How to Determine the Permit Threshold

    A couple of key factors come in to play in determining whether repair costs exceed the 50% threshold. Begin by quantifying every damage and upgrade.

    To be more precise, commonly available building valuation tables, estimates from qualified contractors, or FEMA’s Substantial Damage Estimator software may be used. Remember, local officials are on the front lines of determining where permits are needed.

    Some jurisdictions, for example, require reimbursement calculations to account for costs of enhancements made in the last 24 months, or even five years. Documentation of the incurred cost, such as owner-prepared estimates accompanied by a receipt, is important for full transparency in the future.

    Good documentation avoids liability disputes and makes compliance with regulatory inspection processes easier.

    2. What Repairs Are Included in Costs

    All repairs that would help restore the structure to the condition it was in before the damage occurred should be counted. This involves labor and material costs, demolition work, and the removal of debris.

    If the flood damage to the property is $120,000 to fix, that’s 60% of its market value of $200,000. This implies the project goes beyond the 50% threshold.

    Making accurate estimates up front not only keeps FEMA happy, it helps you sidestep a world of hassle later. An exclusion of all upfront repair costs would result in significant delays for many projects.

    3. Improvements That Influence Calculations

    Improvements such as structural upgrades, roof replacements, or foundation repairs have a big effect on damages calculation. Both interior (e.g., electrical systems) and exterior (e.g., siding) upgrades need to be covered.

    For example, a new HVAC system would be factored into the overall cost, but it increases the value of the property. Some local regulations might require consideration of cumulative improvements over a defined period.

    Documenting these decisions will help show clear compliance with FEMA’s rule.

    4. Costs That Can Be Excluded

    Certain expenses do not count toward the 50% calculation, such as routine maintenance (e.g., painting) and landscaping costs.

    Further, non-structural repairs that don’t add value to the building are exempt. Accurately excluding these costs removes the noise and allows for a focus on the true repair or improvement costs.

    It’s important to make a distinction between required repairs and discretionary improvements when calculating damage costs.

    Understanding Property Values for the Rule

    The FEMA 50% rule determines whether property repairs can proceed after flood damage, emphasizing the importance of substantial damage calculations. It further controls if and how the entire structure must comply with current floodplain management standards. At the core of this rule is a desire for correct property values, focusing on measuring the value of the structure rather than the land. Below, we outline the methods, resources, and considerations that inform these valuations.

    1. How Property Values Are Assessed

    Property values are determined by comparing the condition of the structure prior to the damage to like properties in the locality. Appraisers rely heavily on market data, looking at similar properties in the area and comparing things like size, age, and condition. Transparency in this process is fundamental, making sure homeowners know how values are calculated.

    A 2,000-square-foot house built in 1990 gets matched up with other similar homes in the area. This approach is more in line with the current fair market conditions.

    2. Where to Find Pre-Damage Market Value

    Pre-damage market value, often found in historical appraisals or tax records, is crucial for substantial damage determination. Homeowners should keep copies of past assessments, as these provide a benchmark for local appraisers to offer detailed reports based on regional market trends.

    3. Why Choose a Private Appraisal?

    Private appraisals deliver tailored insights that public assessments may lack, especially when it comes to substantial damage calculations. They offer detailed evaluations, helping homeowners appeal low valuations or support their claims during disputes, potentially uncovering overlooked upgrades that increase the property’s value.

    4. Why Not Adjust Land and Building Values?

    By concentrating solely on the value of the building as it stands, the intent of the FEMA rule regarding substantial damage determination is met. Since land value doesn’t change with construction, creating a separate category for substantial damage calculations is logical. This approach makes the calculations much easier and is consistent with federal guidance.

    Steps to Take After Flood Damage

    The road to recovery from flood damage is daunting. With a step-by-step approach, flood-affected homeowners can more easily find their way home. From documenting the damage to understanding rebuilding regulations, each action plays a critical role in restoring your property safely and efficiently.

    Take pictures to show the degree of damage and make notes. Take clear, well-lit photos of each site of damage, including structural damages, furniture and personal items. Supplement photos with written documentation detailing the damage to create a complete account.

    This is documentation that will be needed for insurance claims and FEMA assistance applications.

    Notify local authorities to document your damage and get direction. Call your local emergency management agency or city/county clerk’s office to report your flood damage. They tend to offer resources that meet immediate needs such as temporary housing or direct financial assistance, provided through FEMA programs, such as Rental Assistance and Disaster Assistance.

    Start determining potential repairs and their costs. Vet contractors, ask for itemized quotes, and plan for repair and preventive enhancements. For instance, moving utilities to higher ground helps prevent future damage.

    Impacts on Pinellas County

    The FEMA 50% rule is of particular significance to Pinellas County. This region includes numerous, vulnerable, low-lying coastal communities and communities that are floodplain areas and flood-prone. This rule is an essential step in the right direction for the National Flood Insurance Program (NFIP).

    It’s allowed them to effectively regulate construction and major repairs in designated flood zones. For homeowners and residents here, it shapes how properties can be repaired or improved after damage, ensuring compliance with floodplain management standards.

    1. Specific Guidelines for Pinellas County Residents

    GuidelineDescription
    Substantial Damage RuleRepairs exceeding 50% of the pre-damage value must meet current flood regulations.
    Substantial Improvement RuleRenovations or upgrades over 50% of the structure’s market value require adherence to flood zone building codes.
    Elevation RequirementsHomes in high-risk zones must elevate to or above the base flood elevation (BFE).
    Permit ApplicationsAll substantial projects require permits through the county’s Building and Development Review Services.

    2. What Homeowners Can Expect After Damage

    Pinellas County residents could be subject to involuntary retrofits following damage due to a disaster. These calculations will decide whether their property meets the 50% rule.

    If a $200,000 home is damaged at $120,000, the homeowners need to repair back up to the current code. This could be done by raising the property or floodproofing with flood-resistant materials.

    These adaptations, while sometimes raising repair costs, are essential to addressing escalating future flood hazards.

    3. Steps for Compliance in This Region

    In order to comply, residents must start by contacting local government officials to determine whether their properties are located in a flood zone area.

    Pinellas County continues to offer unique, proactive resources to help keep residents safe. These include online calculators for determining threshold for improvements, workshops on floodplain management, and best practice guidelines for developing complete permit applications.

    Homeowners should consult with licensed contractors, particularly those experienced in flood mitigation strategies to address FEMA and local requirements.

    Rebuilding and Renovation Considerations

    If you live in a high-risk flood area, the FEMA 50% Rule is an important regulation that all homeowners should know about. This rule stems from the National Flood Insurance Program (NFIP). It profoundly affects the way we do renovations, repairs, and rebuilds—particularly in our selected Special Flood Hazard Areas (SFHAs).

    Here, we’ll outline the biggest things to know for homeowners looking to work within these requirements.

    1. Things to Know Before Rebuilding

    The FEMA 50% Rule classifies a project as “substantial improvement” if the cost of repairs or upgrades exceeds 50% of the home’s market value before the damage occurred. This holds true for both renovations we intend to make and repairs we make after disasters strike.

    For example, if you have a house in a flood zone worth $200,000 and need to repair at $120,000, you’re still subject to your local building code. Meeting floodplain management standards is required in this case. These regulations frequently force the hand of the homeowner by requiring them to elevate their homes.

    The Base Flood Elevation (BFE) usually begins at one foot but can be as high as three feet depending on local ordinances. Homeowners can verify their property’s flood zone designation on a Flood Insurance Rate Map (FIRM) provided by the NFIP.

    These rules are designed to minimize the risk of flooding in the future. This FEMA map pinpoints the counties and localities that are most vulnerable to flooding, so you know you’re under the strictest regulations. It’s important to know these ins and outs.

    In the last five years, every single state has experienced flooding, yet only 27% of households are covered by flood insurance.

    2. Upgrading During Repairs and Its Impact

    During a repair or renovation, homeowners often explore upgrades to modernize or improve functionality. Once you go over that 50% threshold, you are subject to heavy, substantial compliance requirements.

    Any homeowner who is rebuilding in Florida’s coastal areas should strongly consider elevating their property. This important step will go a long way towards preventing future flood loss. This can add to initial costs, but it can save money in flood insurance premiums and provide future flood-related peace of mind.

    These renovations can improve energy efficiency or deliver years’ worth of savings on electric and water bills. For instance, using flood-resistant materials or elevated electrical systems can greatly reduce destruction in coming floods.

    3. Long-Term Benefits of Elevating Your Home

    It’s not just a regulatory requirement to meet elevation requirements, though — it’s an investment in the property’s long-term viability. By elevating a home, the risk of flood damage recurring again and again is greatly diminished, helping the NFIP achieve its purpose of avoiding future losses.

    Florida waterfront homeowners enjoy their views of the state’s scenic waterways and natural beauty. These measures allow them to appreciate their beautiful surroundings without the looming threat of floodwaters.

    On top of that, elevated homes are simply more appealing to homebuyers, making them more likely to have a higher resale value. The short-term costs of elevation are offset by long-term benefits such as lower repair expenditures, decreased insurance premiums, and increased safety.

    Why Contact TomCo Solutions?

    Navigating the intricacies of the FEMA 50% Rule requires expertise and accuracy, especially regarding substantial damage determination. TomCo Solutions serves as a trusted resource for property owners, providing the transparency and creative solutions necessary to meet substantial damage requirements and regulatory obligations effectively.

    1. Expert Assistance with FEMA Guidelines

    TomCo Solutions has a proven track record of helping applicants navigate FEMA’s complicated regulations.

    Understanding the 50% Rule Many property owners are understandably confused. It limits repair reimbursement to 50% of a property’s pre-disaster value. Their team’s expertise takes the headache out of compliance.

    They demystify jargon, clarify confusing thresholds, and help you find cost-effective approaches to comply with obligations. As just one example, they assist in analyzing DEI construction estimates to prevent disqualification for non-compliance.

    This proactive approach avoids costly delays and makes sure that communities’ rebuilding plans are headed in the right direction to meet FEMA standards.

    2. Personalized Support for Property Owners

    Each property has its own set of challenges, and that’s where the TomCo Solutions team crafts a custom plan to address the specific property.

    They work intimately with private property owners to understand their specific needs. That might mean evaluating a single-family home within a floodplain or making emergency repairs to an industrial site.

    Their tailored strategy fosters confidence by tackling issues head-on. They deliver straightforward answers and steer informed choices to match specific requirements and wallet.

    3. Reliable Property Valuation and Appraisal Services

    Proper property valuations are extremely important when working within the 50% Rule.

    With TomCo Solutions’ reliable appraisal services, you can be confident that pre-damage property values have been captured with accurate documentation. Their detailed reviews account for the current market landscape, property status, and all FEMA requirements.

    This level of diligence and scrutiny make sure that every possible valuation serves the owner’s best interests and minimizes the risk of contention with local stakeholders.

    Conclusion

    The FEMA 50% Rule is one of the most consequential federal policies shaping how flood-damaged properties are repaired or rebuilt. It affects out-of-pocket costs, permitting, and future vulnerability to risk. Being able to figure out damage vs. Improvement costs and grasping property values go a long way toward making the process easier to navigate. Pinellas County residents, like many across the country, are starting to experience these impacts as they attempt to plan for critical repairs or upgrades. With thorough planning in advance, communities can save time, money, and frustration.

    Don’t let the 50% rule intimidate you. TomCo Solutions is here to help you navigate the process. Our knowledge and experience keeps you in compliance and protects your investment. Whether you are rebuilding or renovating, working with the right team makes all the difference. Don’t leave it up to fate! Contact TomCo Solutions today for assistance that will get you started on the road to recovery.

    Frequently Asked Questions

    What is the FEMA 50% Rule?

    The FEMA 50% Rule is essential for determining whether a structure must comply with current floodplain management regulations. If the substantial damage calculation for repair or improvement costs exceeds 50% of the building’s market value, the structure must be reconstructed to meet applicable codes.

    Who does the FEMA 50% Rule affect?

    FEMA’s 50% rule significantly impacts property owners in FEMA-designated flood zones, particularly during substantial damage determination when repairing flood damage or making substantial improvements to buildings in these mapped areas.

    How are the repair or improvement costs calculated?

    Costs cover materials, labor, building permits, and more. A licensed contractor or property appraiser can provide a realistic estimate, factoring in substantial damage calculations and current floodplain codes.

    How is the property’s market value determined?

    Market value is based on the building’s pre-damage value, excluding land, and should reflect the substantial damage determination. Use an official property appraisal or tax assessment to determine this value.

    What should I do after my property sustains flood damage?

    It’s important to document the damage condition, contact your insurance provider, and consult with a FEMA-compliant contractor. Clarify with local officials about the substantial damage requirements and whether the FEMA 50% Rule would affect your repairs.

    How does the FEMA 50% Rule impact Pinellas County?

    To protect residents from future flooding, Pinellas County vigorously enforces the rule regarding substantial damage calculations. Property owners in flood zones must follow local building codes and FEMA guidelines for repairs and renovations.

    Why should I contact TomCo Solutions about the FEMA 50% Rule?

    TomCo Solutions is an expert in FEMA compliance and restoration of flood-damaged properties, ensuring proper flood venting and adherence to community floodplain management regulations. Our local expertise will help your property comply with substantial damage requirements while maximizing your investment

  • How much will FEMA pay for Hurricane or flood damage?

    How much will FEMA pay for Hurricane or flood damage?

    How much will FEMA pay for Hurricane or flood damage?

    As of 2025, FEMA provides up to $43,600 for housing assistance and other needs assistance. These amounts are capped each year and only apply to eligible individuals or households impacted by federally declared disasters.

    Housing assistance can be used to pay for things such as home repair, rental assistance, and temporary housing. Needs assistance covers things like medical costs, personal property, and transportation. This aid is intended to supplement—not replace—insurance or other recovery resources.

    FEMA assistance is meant to address immediate, urgent needs. It is a critical lifeline program that helps disaster survivors get back on their feet with safe, stable living environments after hurricanes and major disasters.

    What FEMA Covers for Hurricane and Flood Damage

    When hurricanes cause overwhelming damage and especially flooding, FEMA can provide direct financial assistance to help with recovery. Repairing homes is a crucial aspect of this support. This unprecedented assistance includes everything from repairing damaged houses to replacing lost vital belongings. Knowing the difference between these categories is essential to filing an informed claim.

    Types of Damages Eligible for Coverage

    FEMA covers damages directly caused by hurricanes, including structural damage to homes, flooding, and wind-related destruction. This may include broken roofs, shattered windows, and waterlogged interiors.

    Damages like pre-existing issues or those covered by insurance are typically excluded. Accurate documentation, such as photos and receipts, is essential when filing a claim. A thorough assessment ensures eligibility and helps FEMA determine the appropriate level of assistance.

    Assistance for Home Repairs

    FEMA pays for repairs that are necessary to make homes safe, sanitary, and livable. This might involve repairing roofs, replacing flooring, or making repairs to electrical or plumbing systems.

    To qualify, applicants need to prove the damage was directly related to the disaster and not covered by their insurance. We’re able to process funds as soon as we finish an inspection or estimate. Typical home repairs consist of roof patching, replacing drywall, and restoring structural integrity.

    Temporary Housing and Relocation Costs

    Temporary housing assistance includes hotel stays or rental units when homes become unlivable. FEMA will reimburse moving expenses if you need to relocate permanently.

    To qualify, you need to show that was your primary residence. Help generally lasts several months at most, and frequently even less.

    Personal Property and Essential Needs

    FEMA helps replace essential personal property such as clothing, bedding, and appliances that are used in the home and essential to the applicant’s daily life.

    Provide a detailed inventory with proof of ownership or, if applicable, value. Essential needs, like medical equipment or childcare supplies, are reimbursable.

    Maximum Financial Assistance from FEMA

    FEMA provides financial assistance to help individuals and households recover from disasters such as hurricanes. The reality is that FEMA can only provide so much assistance. Getting a handle on these limits will be key to smartly planning long-term recovery efforts.

    Below, we’ll demystify the details behind FEMA’s maximum financial assistance, including caps, factors affecting aid, and spending limitations.

    1. Current Limit for Individual Assistance

    The maximum amount that FEMA can provide disaster survivors through their Individual Assistance (IA) program is $43,600 as of 2025. This cap includes both housing assistance for permanent repairs and temporary relocation. It covers other needs, including medical costs and personal property loss.

    These federal funds will not come close to paying for all of the recovery costs. Rather, they function as a safety net, aiding in the protection of short-term needs.

    FEMA has a limit, which they raise in response to the severity of the disaster and the number of individuals affected. So, for instance, if damage is widespread, more money could be devoted per affected household under the cap.

    Recent increases to the limit have been made to accommodate housing and repair cost inflation. This change helps make sure that assistance reflects the costs of living today.

    2. Factors Determining the Maximum Amount

    There are many factors that determine the maximum amount of assistance that a person or household is eligible to receive. FEMA takes into account the level of uninsured damage noted in the inspection of the home.

    If all or part of a loss is covered by insurance, FEMA assistance serves to fill in those gaps for eligible expenses. Household income doesn’t come into play when determining the cap, however, ensuring complete documentation—such as receipts and repair estimates—can help get the most out of claims.

    3. Annual Adjustments to FEMA Limits

    To address rising costs from inflation and other economic trends, FEMA reviews these limits every fiscal year. The 2025 increase reflects ongoing inflation and higher disaster recovery costs nationwide.

    Being aware of these changes helps make sure that disaster survivors are aware of all the resources available to them.

    4. Restrictions on FEMA Spending

    FEMA aid is not easy money — it’s heavily regulated. Assistance is limited to home repair, other disaster-related medical expenses, etc. Non-reimbursable expenses, such as luxury upgrades or costs unrelated to the disaster, are not covered.

    Failure to understand these limitations frequently results in denied claims, so following the rules is critical.

    Applying for FEMA Assistance

    When disaster strikes, applying for FEMA disaster assistance can help you get the financial assistance you need to recover. It’s important to know the process, know what’s required, and know how to properly and fully fill out an application.

    Below, we unpack each step and requirement to help walk you through this process successfully.

    Eligibility Requirements for Applicants

    To receive FEMA’s assistance you must meet several criteria. This includes the requirement to be a U.S. Citizen, a non-citizen national, or a qualified alien.

    Most importantly, eligibility depends on the need to live in a designated disaster zone. FEMA assistance is limited to damages incurred directly due to the disaster, so make sure your losses meet this criteria.

    Have your supporting documentation prepared. This requires providing identification, verification of where you lived, and ownership or tenancy of the property that was damaged.

    For renters, a copy of your lease agreement will be required. If you are someone who has received FEMA assistance in the past, this will disqualify you. This is particularly the case if you misappropriated prior funding or if duplicate claims are discovered.

    Necessary Documentation for Applications

    Essential documents include:

    • A government-issued photo ID
    • Proof of residency (utility bills or lease agreements)
    • Property deeds or mortgage statements
    • Insurance information, including claim determinations

    Incomplete or inconsistent documentation regularly slows down claims. Maintain all paperwork in a physical folder or digital file to reference as needed.

    Labeled sections can help minimize confusion and re-work, streamlining the review process and saving valuable time.

    Steps to Submit a FEMA Application

    Submitting your FEMA application involves several steps:

    1. Register online at DisasterAssistance.gov or call FEMA’s helpline.
    2. Fill out the application form with as much specific information as possible regarding your losses.
    3. Make an appointment for a FEMA inspection to come and review your damage.
    4. Check back often online or through FEMA’s national service hotline to check the status of your application.

    The more accurate and complete your application, the quicker it can be processed. Verify everything you write against, particularly your contact information and descriptions of your losses to prevent processing delays.

    Timeline for Receiving Assistance

    It can take some time to receive FEMA assistance. Usually, you can expect a decision within 10 days of the inspection. Things like lack of documentation or the need for further verification can add to that time.

    A little patience goes a long way, but consistent communication with FEMA will go further and get you what you need faster.

    You are able to track the status of your application either online or by calling the FEMA disaster assistance hotline. It can help any future communications if you keep your case number readily available.

    Additional Financial Support Options

    FEMA has an important role in helping us survive and recover from any disaster. Its payouts rarely fully cover damages incurred, leading many people and businesses to seek additional financial assistance. Working through alternative funding sources, charitable organizations, state programs, and insurance options can help fill those gaps and support broader recovery efforts.

    SBA Loans for Uncovered Costs

    The U.S. Small Business Administration (SBA) provides low-interest disaster loans to cover costs that FEMA doesn’t cover. These disaster loans are offered to homeowners, renters, and businesses in areas with a presidentially declared disaster. They can be used for home repair, replacement of personal property, and business loss.

    Following Hurricane Helene in North Carolina, FEMA approved $394 million in Individual Assistance awards as of early 2025, with total funding expected to reach $600 million.

    To be eligible, applicants are required to show they have experienced disaster-related damages and submit proof of their overall financial situation. The application process usually consists of an online application form and then usually an inspection to view the damage. For instance, a business owner might secure an SBA loan to repair structural damages to a storefront that FEMA grants don’t cover.

    Charitable Organizations Offering Aid

    Several nonprofit organizations provide disaster relief. Examples include:

    • American Red Cross: Offers emergency shelter, food, and clothing.
    • Salvation Army: Assists with basic needs like utilities or housing.
    • Team Rubicon: Provides cleanup and rebuilding services.

    Local charities are usually in tune with the specific needs of their communities. Most of the time, these organizations will advertise applications for assistance on their websites, so it’s important to research and apply quickly.

    State and Local Government Programs

    Additionally, state and local governments usually run their own disaster recovery programs, in order to fill gaps not covered by FEMA assistance. These programs are able to provide the grants and low-interest loans that are so desperately needed, particularly when federal help falls short.

    Looking into state-specific eligibility is an important step. Resiliency programs, for instance, Florida’s Rebuild Florida program has provided needed assistance to residents repairing hurricane-damaged homes.

    Insurance Policies Beyond FEMA Coverage

    Homeowner, flood, and business interruption insurance provide important supplements to FEMA funding. Taking the time to thoroughly review policy terms can help you understand your coverage limits and any exclusions.

    Figure out how to navigate claims under FEMA applications may appear daunting. If you maintain organized records of your damages and expenses, the process will be much easier. Other tips such as always documenting every single interaction with an insurer help make sure you’re getting everything you’re owed.

    Preparing for Future Disasters

    Natural disasters are inevitable, but the effects don’t have to be catastrophic if we are prepared. Taking the time to prepare in advance will not only help keep your home and finances safe, it will keep your loved ones safe. By learning some key aspects of disaster preparedness, you’ll be able to develop a plan that works best for you and your family.

    Importance of Flood Insurance Coverage

    Flood insurance protects homeowners who live in flood zones. Although a basic home insurance policy would cover a loss from fire or theft, it doesn’t usually cover losses caused by flooding. To mitigate against these risks, federal programs—including the National Flood Insurance Program (NFIP)—provide coverage to help protect Americans from these perils.

    When looking at potential policies, pay attention to coverage limits, deductibles, and exclusions. First, NFIP policies only cover up to $250,000 in structural damage and $100,000 in personal belongings.

    In 2025, NFIP introduced monthly premium payment options, making flood insurance more accessible for policyholders. Taking the time to ask questions and compare providers can help make sure you choose the right policy to match your needs.

    Creating an Emergency Savings Fund

    Maintaining an emergency savings fund is a little-known, but vital financial safeguard for effective disaster recovery. Start by saving a set percentage of your pay each month. Try to have three to six months’ worth of living expenses saved up.

    There are tools, such as high-yield savings accounts, that you can use to grow your fund over time. Protecting this safety net would go a long way toward easing the strain from sudden costs. This includes reimbursement for temporary housing or home repairs while you recover.

    Securing Your Home Against Flood Damage

    Taking steps to proactively protect your home makes it less likely that you will experience catastrophic damage from a disaster. Here’s a list of practical strategies:

    • Move appliances such as water heaters and HVAC systems above base flood elevations.
    • Put in sump pumps with battery backups to handle excess flooding.
    • Seal foundation cracks and waterproof basement walls.
    • Choose flood-resistant materials during renovations—like tile rather than carpet.

    Vulnerabilities can be avoided through regular home inspections and following local building codes. Retrofitting homes with flood mitigation measures such as flood vents or elevating structures are strong measures.

    FEMA’s Safeguarding Tomorrow Revolving Loan Fund program now prioritizes underserved communities, aiming for at least 40% of benefits to flow toward these areas.

    Developing a Disaster Preparedness Plan

    An effective disaster preparedness plan involves three key elements. Have evacuation routes, emergency contacts, and a supply kit with food, water, and medications prepared and easily accessible. Including all members of your household will help make sure that everyone knows their roles in the event of a disaster.

    Even beyond the disasters themselves, plans must be reviewed and updated at least annually to address emerging risks or changes in circumstances. Resources like FEMA’s Ready.gov can help with templates and guidelines to make this process easier.

    Conclusion

    When disaster strikes, FEMA can be a vital lifeline — providing assistance to get you back on your feet when you need it most. Though their assistance is not without bounds, it helps to alleviate the cost of repairs, temporary relocation, and other immediate needs. Information is power—for a disaster survivor, understanding what they cover, how to apply, and their unique processes can make a daunting process seem less overwhelming. It’s not wise to seek other assistance sources but to be prepared with an alternative response to future calamities. Being proactive and educated are the best ways to recover more quickly and efficiently.

    Use this time to make sure you’re familiar with your coverage, have all the right documents in order, and know what to expect in your area. It’s not about what happened yesterday, though. If you have questions or need additional assistance, contact us. Help is available—you just have to know where to find it.

    Frequently Asked Questions

    What is the most FEMA will pay for hurricane or flood damage?

    As of 2025, the most FEMA will pay for hurricane damage is $43,600. This is set by Congress and can vary each year. That includes housing assistance and other needs assistance. Read the latest on FEMA’s website.

    Does FEMA cover all hurricane damage?

    FEMA does not pay for all hurricane damages, no. Assistance is intended for short term needs such as temporary housing, repair and replacement of a damaged home, and personal property. It’s not meant to serve as a replacement for insurance, nor does it reimburse high-end possessions or homes away from primary residence.

    How do I apply for FEMA disaster assistance?

    You can apply online at disasterassistance.gov, through the FEMA mobile app, or by calling 1-800-621-3362. Have your Social Security number, insurance information, and a description of damages or losses handy.

    Does FEMA help with home repairs?

    Yes, FEMA does provide grants for necessary home repairs to ensure your home is safe, sanitary and that it provides the basic requirements for healthy living. The help comes with strict limitations, meaning it won’t pay for all necessary repairs. Other assistance could be provided by insurance or other federal programs.

    Can I get FEMA aid if I have insurance?

    Sure, but FEMA aid is meant to be secondary. You have to first file a claim with your own insurance. FEMA can assist with losses that are uninsured or underinsured outside of what your policy covers.

    Are there other financial options besides FEMA after a hurricane?

    Yes, look into Small Business Administration (SBA) disaster loans, state programs, or local charities. These can supplement FEMA assistance if you require additional funds.

    How can I prepare financially for future hurricanes?

    Buy flood insurance, start an emergency savings fund, and catalog your valuables are among the advice offered. FEMA urges you to create a disaster plan to lessen the impacts of future disasters. Planning ahead and investing in resilient infrastructure today will save taxpayers billions in disaster relief tomorrow.